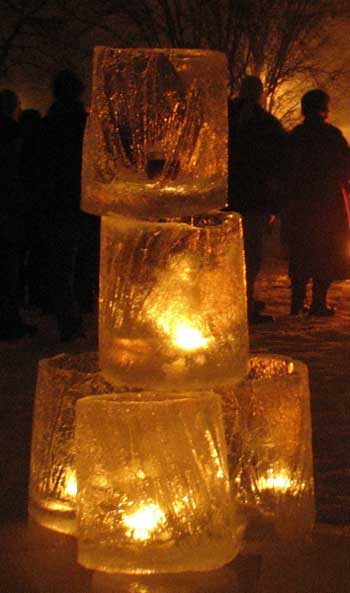
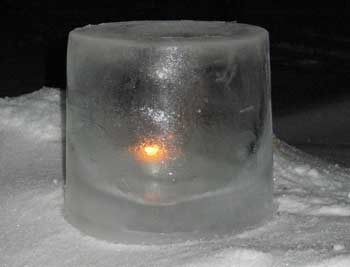
Each year for Madison, Wisconsin's EastSide Winter Solstice bonfire celebration we make ice luminarias -- sculptural ice enclosures with candles inside. Each year people ask lots of questions about how we do it. Over the years we've tried different methods, with varying success. You can learn from our experience; here's a how-to guide for two different methods of making your own ice luminaria. You need:
Time to make: Anywhere from a day to a month, depending....
Method 1-- Slow Freezing with Self-forming Well Natural freezing -- that is, freezing the luminarias slowly outdoors -- arguably yields the nicest results: clear ice with sparking veins and crystalline formations, and a self-forming candle well. Freezing luminarias naturally outdoors has been compared to baking in reverse. It takes time and attention. The secret is slow, natural freezing. |
|
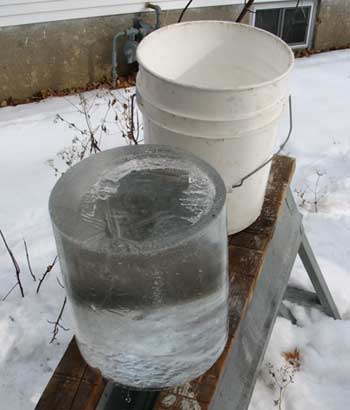
A container of water will freeze from the outside in, the center freezing last. If you could interrupt the freezing of water in a bucket and remove the partially-frozen block, you'd find the ice at the top thicker than the sides, the bottom thinner yet (if frozen at all), and the center filled with liquid water, Turn it upside-down, pour out the water and you have a naturally formed depression or well in the ice. Place a candle inside and you have an ice luminaria. So, can you fill a bucket with water, set it outside in winter and the next day you'll have a luminaria? Unlikely. Water freezes into ice at 32 degrees Fahrenheit, right? Well, in theory. In real life, don't expect that just because the temperature dips below 32° a bucket of water will soon freeze. In fact, with temperatures ranging from, say 25 to 32, you could wait a long time -- days or weeks -- for your ice to freeze. (Making one or two small luminarias is easy in your home freezer -- see the description below.) |
 |
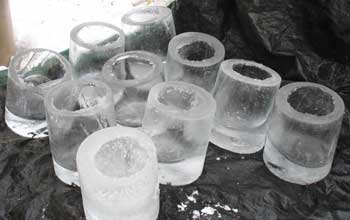
| The reasons have to do with the physics of phase change, but suffice to say that such variables as the size of the bucket(s), the number of buckets grouped together, a bucket's location, the average daytime and nighttime temperatures, and the wind and sun all affect the rate of freezing. | It's not possible to give a firm time estimate for this freezing method. You're trying to achieve ice thick enough to withstand handling but thin enough to sparkle. A good target range of wall thickness is .75 to 1.5 inches. See below for how the judge this. |
|
|
For example, in December of 2007, central Wisconsin had two weeks of temperatures in the range of 15 to 20 degrees Fahrenheit. Still, after 3-4 days the buckets had only a paper-thin sheet of ice on top. It took about two weeks to freeze 40 five-gallon buckets (sitting close together in order to manage tarping) to an adequate ice-wall thickness. On the other hand, temperatures leading up to the 2009 Solstice -- nights into the single-digits and days consistently in the 20s -- were near-perfect; only a week was needed to produce a fine crop of ice candles. |
|
Some tips for freezing water outdoors:
|
|
|
Estimating the thickness of the ice wall and therefore the size of the candle well takes a bit of practice. With natural freezing you can't rely on consistent timing, nor will you be able to successfully decant a fragile, too-thin ice block to check it and then put it back in the bucket to continue freezing. So until you have some experience, watching air bubbles as the ice thickens is your best indicator. The refractive index of water, and the increasing opacity as ice forms makes this a bit tricky, but with care it works. (below) This bubble indicates a too-thin wall. Longer freezing is needed.
|
You may have to bump the bucket, or 'stretch' the rim to get some bubbles active. Air bubbles viewed through the ice seem close to the surface, making the top ice appear thinner than it actually is. Refraction also makes the sidewalls appear thicker than they really are. Here's a diagram of what to look for...
|
|
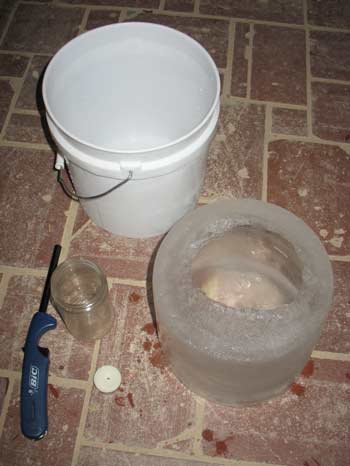
It's feasible to achieve clear --if less stunning-- ice artificially if you have control over the conditions and if making only one or two luminarias at a time is acceptable. The freezer compartment of most home refrigerators can fit a two-gallon bucket; a chest-type freezer will easily hold one or more five-gallon buckets. We've found that at zero degrees Fahrenheit a two gallon bucket of water starting at 50° will freeze with adequate wall thickness and good clarity in about 12 hours.
|
2-gallon luminaria frozen in a home freezer |


 Comments? lou@designcoalition.org